The Benefits of AI for Your CV
- Massive Time Savings: No more spending hours on layout and formatting.
- Targeted Content: AI tailors your skills to match the job description perfectly.
- ATS Optimisation: Keywords are naturally integrated to pass software filters.
- Modern & Fluid Design: Professional templates ready to use.
1. Why create your CV with AI in 2026?
The job market is more competitive than ever. Recruiters heavily rely on Applicant Tracking Systems (ATS) to filter applications. Using an Artificial Intelligence like CVByAI ensures not only a flawless design but also content crafted to persuade.
The 2026 version of our interface features an intuitive workspace, combining the generative power of AI with real-time customisation of your document.
2. Step 1: The "Input" Tab and Data Import
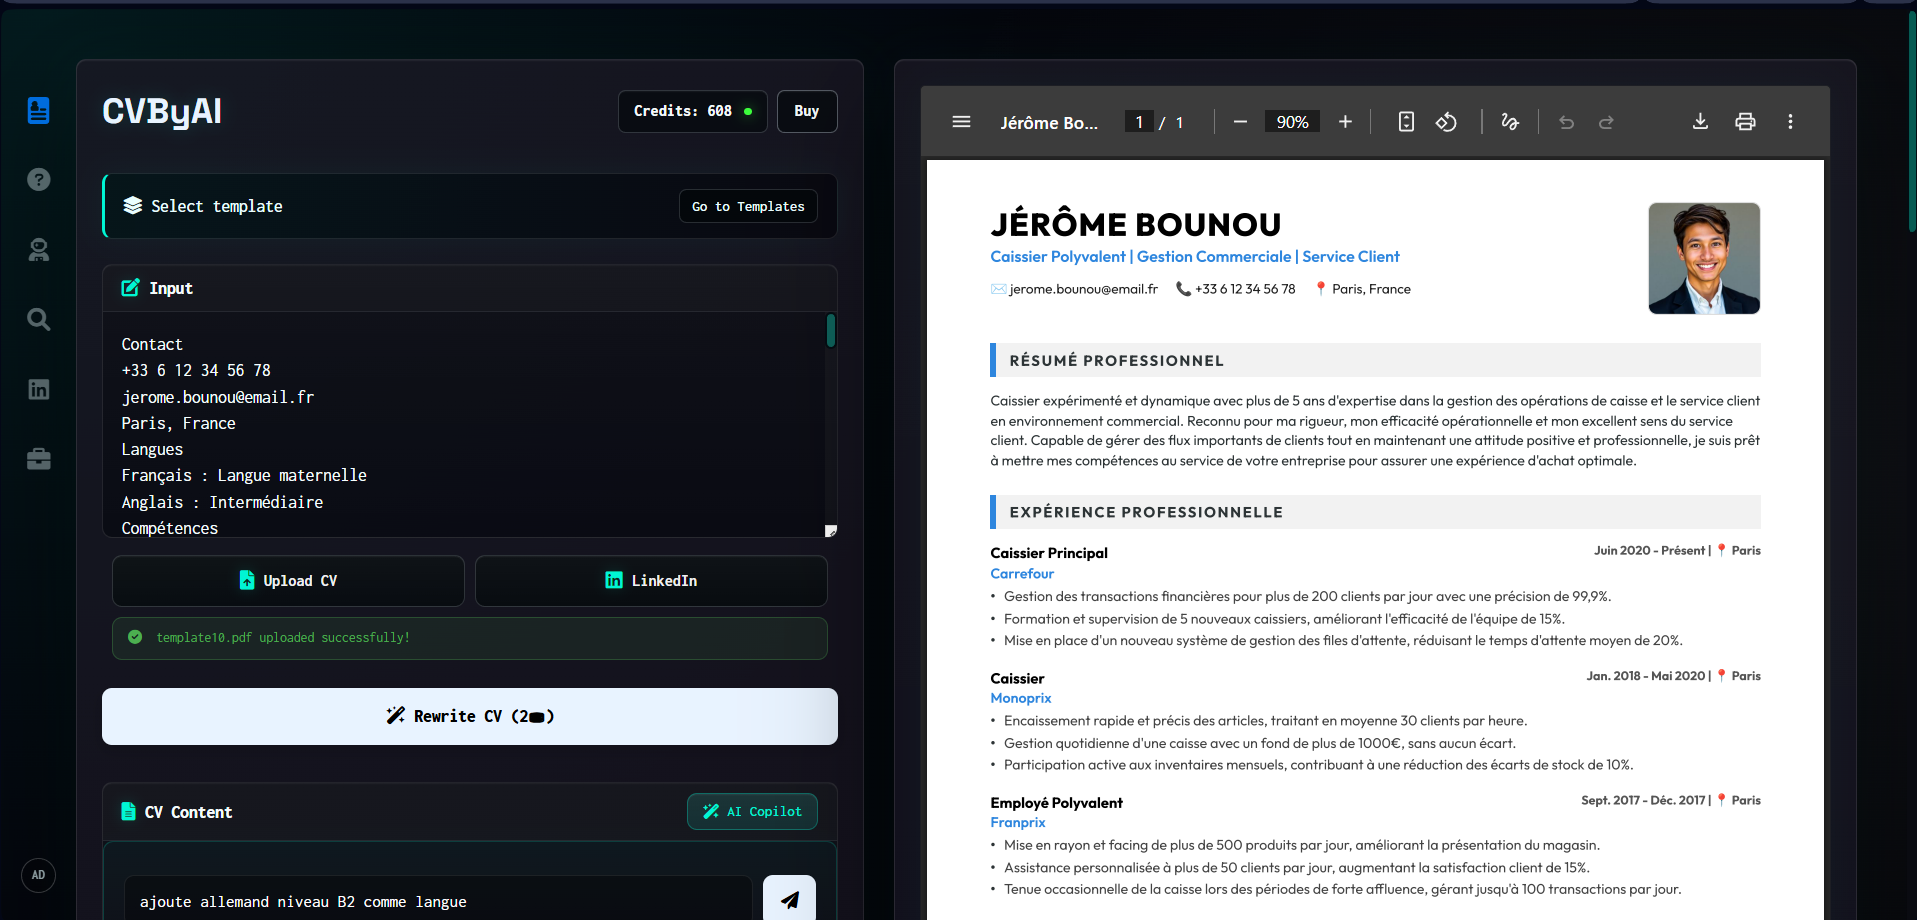
To get started, go to the creation page. The CVByAI interface is smartly divided into two main columns: the command area on the left, and the preview on the right.
In the left column, the Input section allows you to provide your basic information to the AI. Several convenient options are available:
- Manual Entry or Prompt: Paste your text or write a clear request.
- "Upload CV" Button: Directly import your old CV in PDF format for the AI to extract data.
- "LinkedIn" Button: Connect your profile to instantly pull your experiences.
Once the information is filled in, simply click the "Rewrite CV" button to let the AI transform your data into professional content.
3. Step 2: Content Editing and AI Copilot
After the initial generation, the result appears in the CV Content section. The great advantage of CVByAI is that the generated text remains entirely editable, just like in a classic editor.
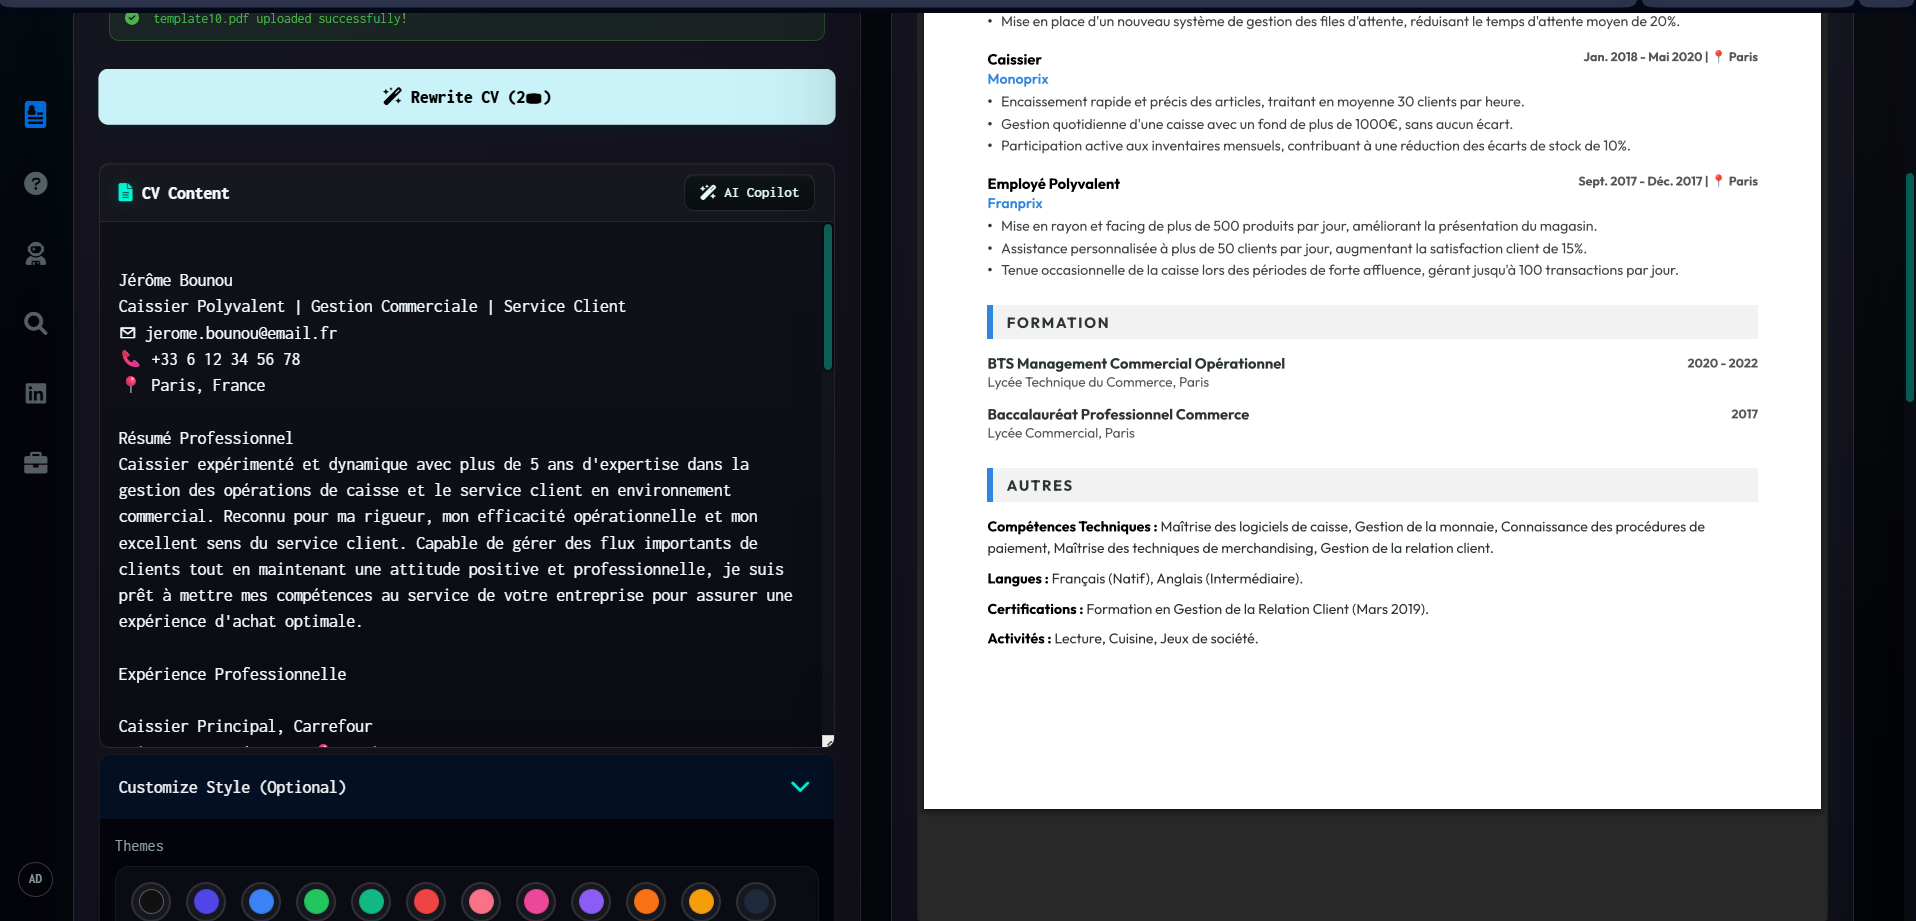
Moreover, a true assistant is at your disposal:
- Manual Editing: Freely adjust the text so it perfectly reflects your background.
- "AI Copilot" Feature: Click this button to open a prompt bar directly in the editor. You can type specific instructions there, for example: "add German B2 level as a language", and the AI will update the text automatically!
4. Step 3: The "Customise Style" Menu
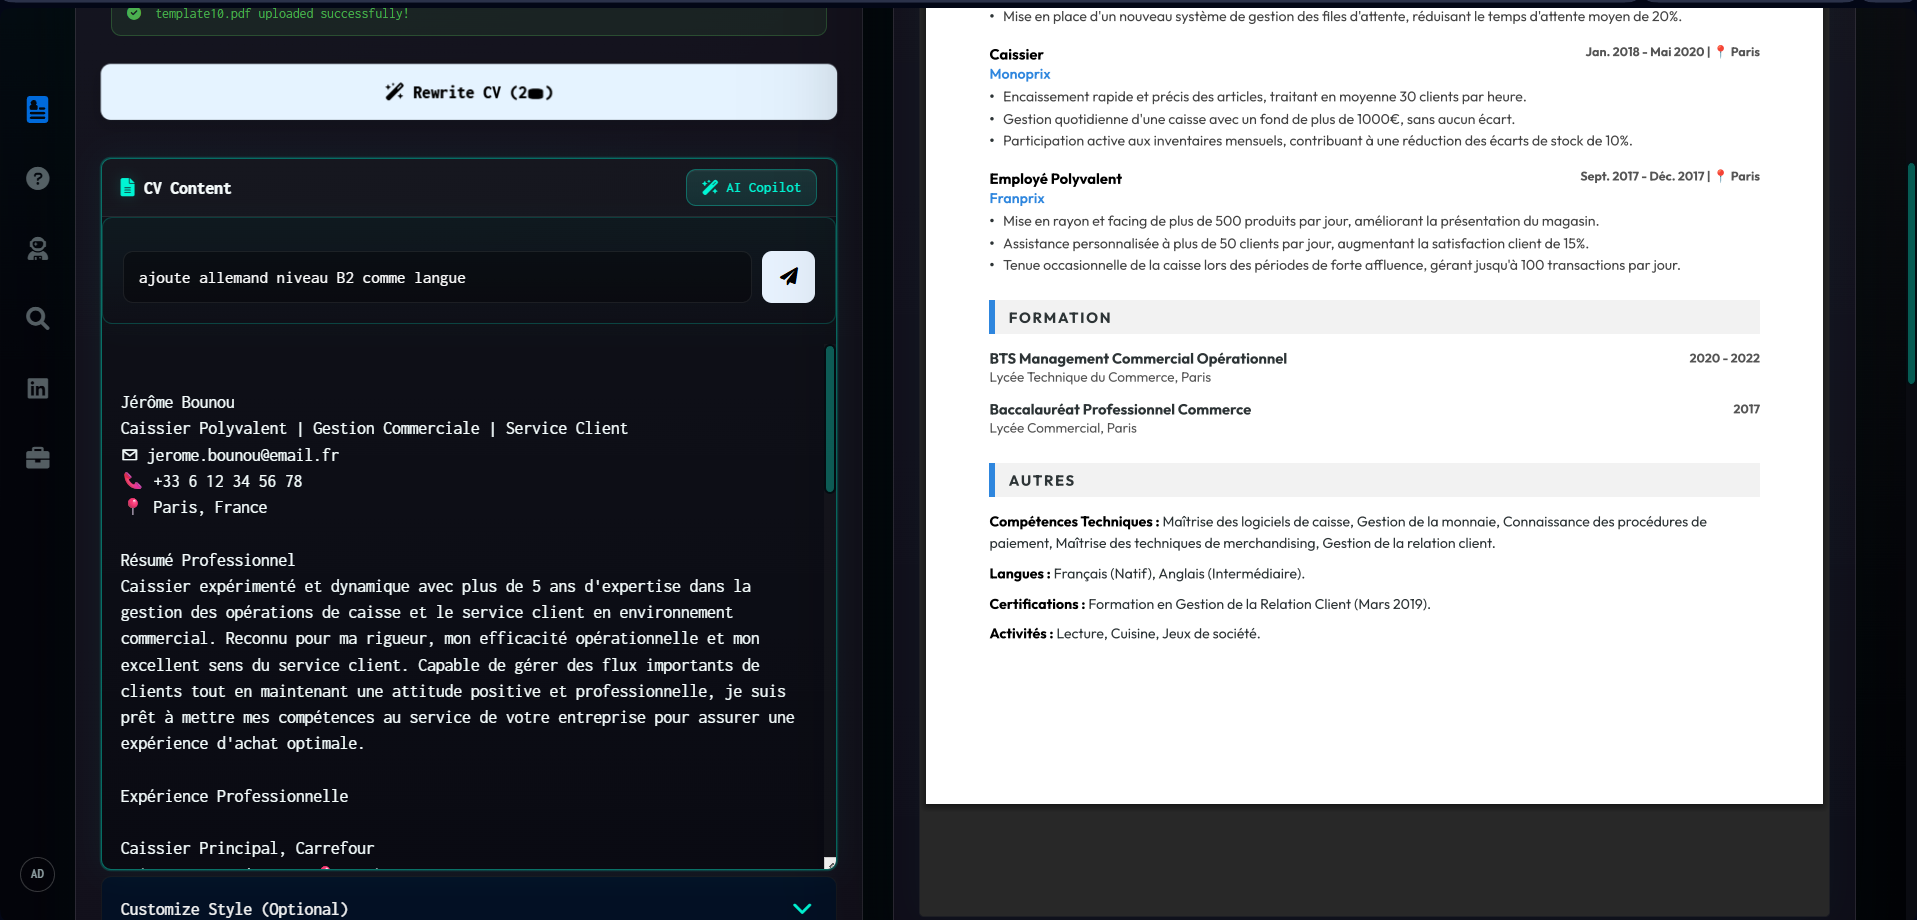
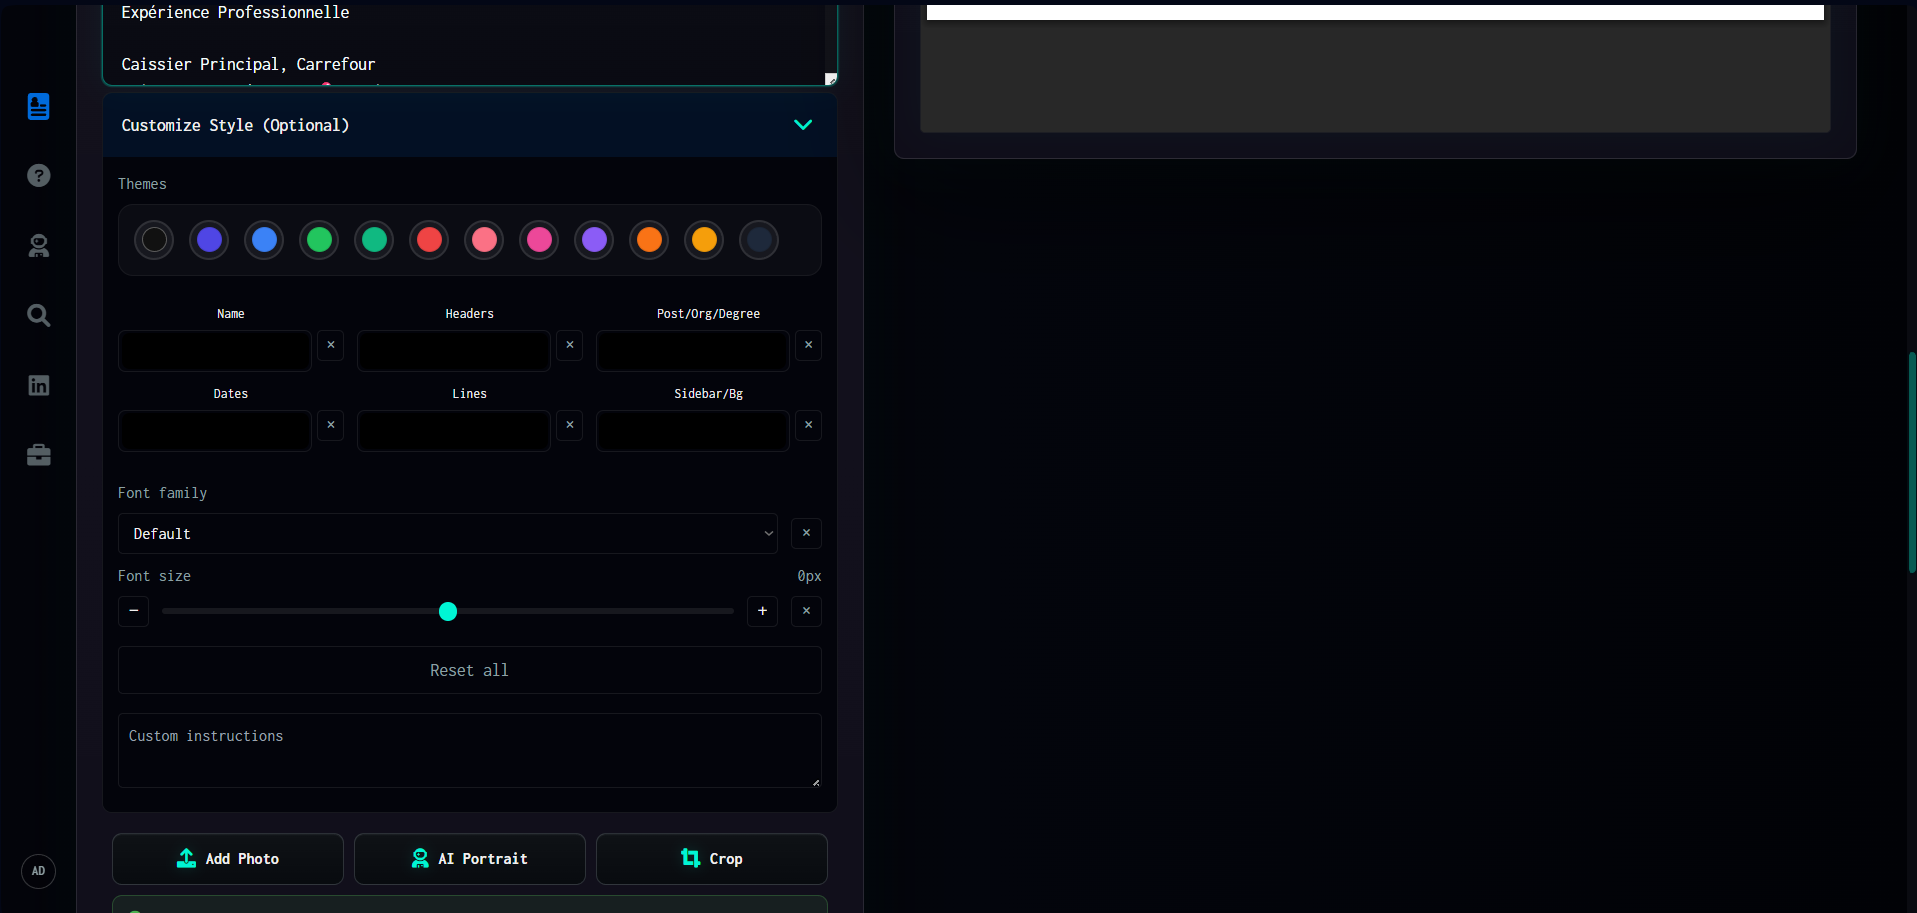
By scrolling down, you access the Customise Style panel, offering total control over the aesthetics of your CV:
- Themes and Colours: A choice of palettes via colour swatches to customise different elements (Name, Headers, Dates, Lines, Background...).
- Typography: Change the font and adjust its size with an intuitive slider.
- Augmented Profile Picture: The "Add Photo" and especially "AI Portrait" buttons allow you to integrate or generate a perfect professional headshot directly within the tool.
5. Step 4: Choosing the Template
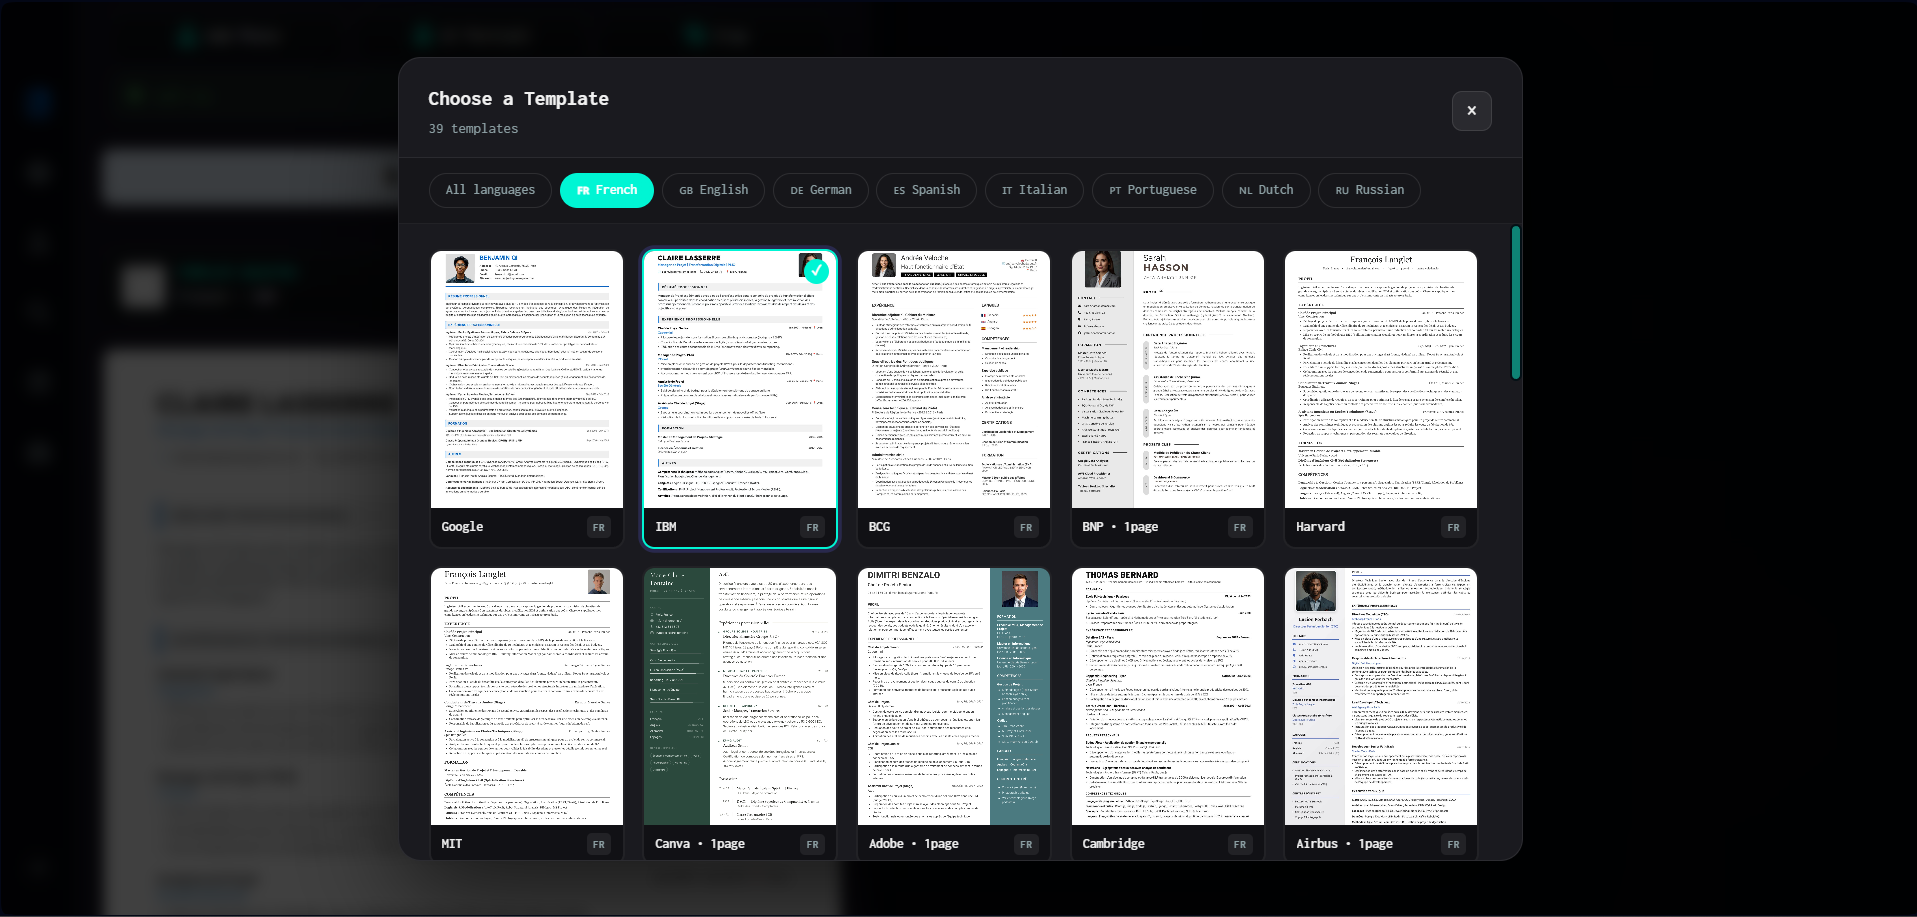
This is a fundamental step of the creation process! By clicking on the current template in the customisation menu, a modal opens with over 39 professional templates (Google, IBM, Harvard, BCG, etc.).
You can easily filter templates by language (French, English, German...) to find the perfect layout that highlights your profile.
6. Step 5: Generating and Exporting the Final CV (PDF)
Once all your customisation and template choices are finished, the changes don't apply by magic! You must click the large "Generate CV" button (which consumes 2 credits). The system will then recompile your document with AI and update the preview on the right with your new design.
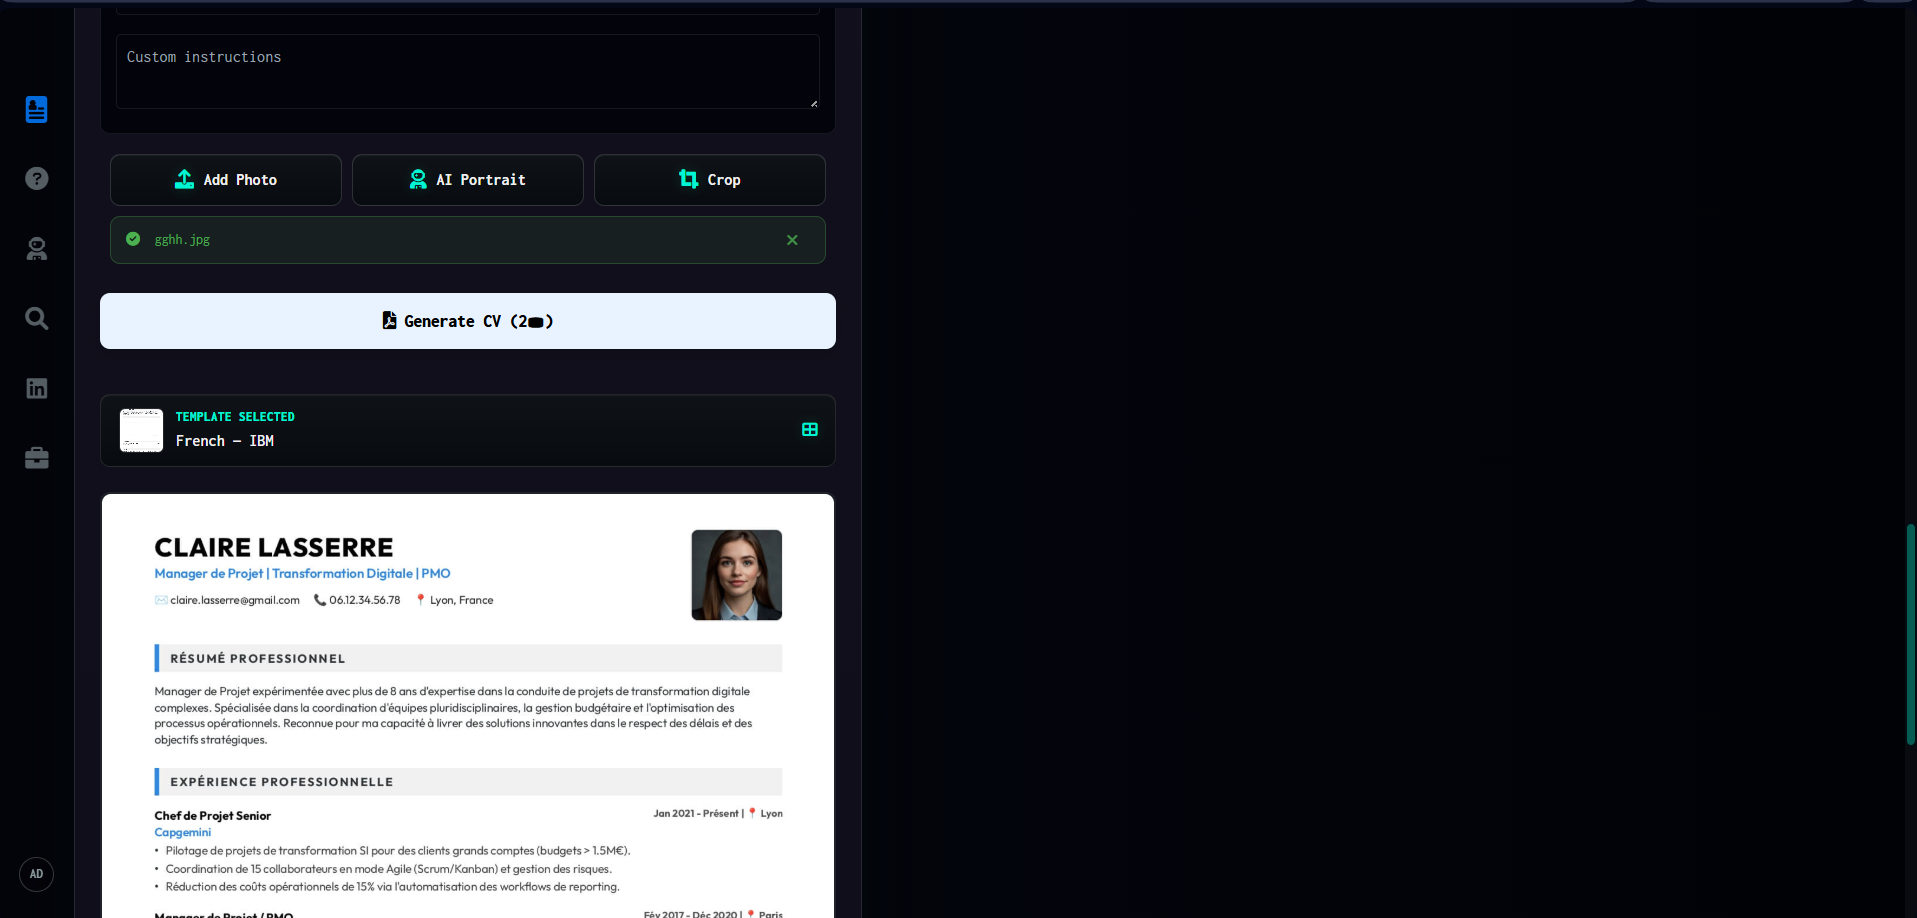
Finally, look above the preview: a comprehensive toolbar allows you to manage the zoom. If you are satisfied with the result, just click the download (downward arrow) or print icon. CVByAI instantly generates a high-resolution PDF file, with a layout guaranteed without any distortion, ready to impress recruiters!